How to Cut Rubber Gym Mats? Step-By-Step Rubber Gym Flooring Guide
Creating the ideal gym space is about optimizing every inch for functionality and safety. Central to this optimization is gym mat flooring. Gym mats are an integral aspect of any home gym or commercial gym.
Custom-fitting gym mats serve as a foundational element in any gym environment. A mat that doesn’t fit properly can become a tripping hazard or fail to provide coverage where it’s most needed. Imagine doing a high-intensity workout and constantly adjusting or tripping over an ill-fitting mat. It’s unsafe.
Benefits of Perfectly Cut Rubber Gym Mats Flooring
Cutting rubber gym mats requires precision, measurement, and care. From marking out the exact dimensions to making the final cut, the process demands attention to detail to achieve the desired outcomes of safety, aesthetics, and durability.
Properly Cutting Gym Mats Provides Safety
This is paramount. Cut rubber flooring prevents accidents by ensuring there are no upturned straight edges or uneven overlaps. They offer consistent shock absorption across the floor, reducing the risk of injury during workouts.
Aesthetics Environment
A gym space should be inviting. Crisply cut rubber mats provide a neat, professional look that screams ‘high-quality’. This visual appeal can be especially important for commercial gyms looking to attract and retain members.
Durability
A poorly cut mat can wear out quickly along its edges. When you make your first cut nice and straight, rubber mats distribute wear evenly, resulting in a longer lifespan and better value for your investment.
Materials and Tools Required to Cut Rubber Flooring Mats
To achieve the perfect fit for your rubber gym mats, having the right tools on hand is crucial. Each power tool plays a pivotal role in ensuring accuracy, ease, and safety during the cutting process.
Here’s your definitive checklist and a brief explanation of why each item is essential:
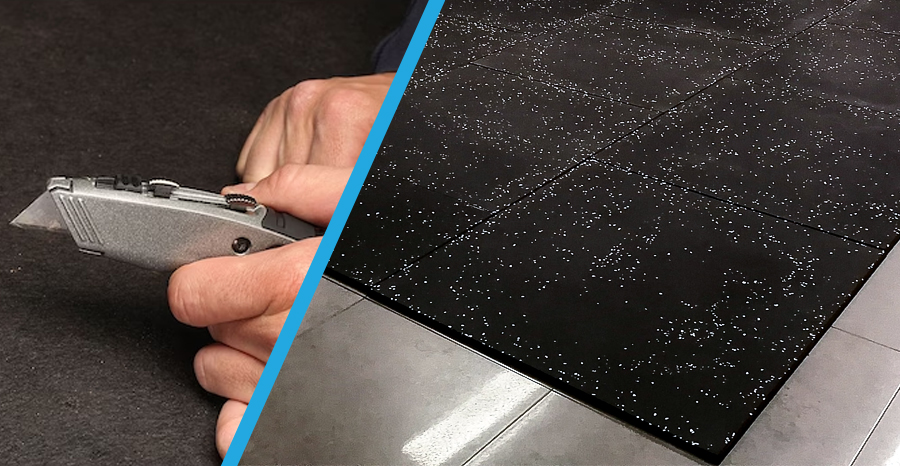
- A sharp Utility Knife or Box Cutter is the primary tool for this task. It ensures precise and clean cuts even at tricky spots. Make sure the blade is sharp. A dull knife can lead to jagged edges or require excessive force, increasing the chances of an accident.
- Straightedge or T-square will act as your guide to ensure that the lines are straight and at perfect angles. This is especially crucial for mats that need to fit snugly against walls or other gym equipment.
- Measuring Tape helps with accurate measurements. Before making any cuts, you’ll need to measure the area where your mat will be placed. A good measuring tape helps you determine the right dimensions for your mat to ensure it fits perfectly in its designated space.
- Marker or Chalk comes after you’ve taken measurements. Using a marker or chalk, you can outline where you’ll be cutting. This visual guide will aid in making accurate cuts, ensuring you don’t stray from the desired dimensions.
- Rubber Gloves (Optional but Recommended for Safety) are essential to have a firm grip on both the mat and your cutting tool. A pair of protective rubber gloves offer a better grip. Additionally, they provide a protective barrier against any accidental nicks or cuts.
- Cutting Board or Thick Cardboard is vital to protect the surface underneath your gym mat while cutting. Placing a cutting board or a piece of scrap wood underneath ensures you don’t damage your floor tiles or table. It also provides a stable surface, making the cutting process smoother.
Preparation Before Cutting Rubber Gym Flooring
Before you even pick up your utility knife, there’s the groundwork to be done. Ensuring that you’ve correctly prepared your rubber gym mat is essential to the success of the whole operation.
Cleaning the Gym Mats
First things first, always start with a clean mat. Any accumulated dirt, dust, or residual grime can be a silent saboteur during the cutting process. Dirt or grime can cause snags, leading to uneven or jagged cuts. Plus, a clean surface ensures that any markings you make are clear and visible.
- Cleaning Agents: Use a mild detergent mixed with warm water for an adequate yet gentle clean. Avoid harsh chemicals which could potentially degrade the mat’s material.
- Techniques: Use a soft cloth or sponge. Gently scrub the mat’s surface in circular motions, ensuring you cover every inch. Rinse with clean water and allow the mat to air dry completely before moving to the next step.
Laying the Mat
A key to a perfect cut is laying rubber gym mats on a flat foundation. You’ll want to find a spacious area such as a large table or the floor, that’s devoid of obstructions. This ensures you can work unhindered.
But what if the mat doesn’t lie flat? If you encounter curls or bubbles, don’t worry. Here are a couple of tricks:
- Consider reversing the mat or placing weights or bricks on the corners. After a few hours, those curls should ease out.
- Another handy DIY trick involves gentle heat. A hairdryer on a low setting can be used to warm and relax the curled areas.
Marking the Cut
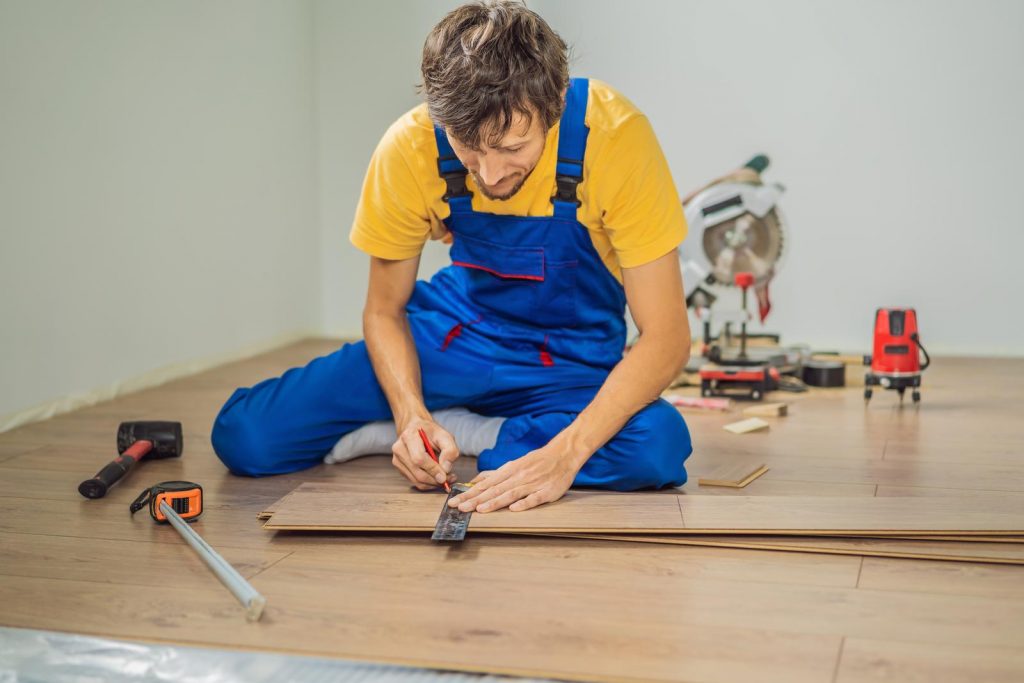
- Measure Twice, Cut Once: Using a measuring tape, determine the exact dimensions required for your space. Note down the measurements and double-check for accuracy. Before you want to cut, remember that an error in measurement can result in a poorly fitting mat. Keep soapy water to clean the knife every time you cut.
- Drawing the Line: With your accurate measurements in hand, use a marker or chalk to outline the area you need to cut. Ensure your lines are straight and visible. If straight lines are crucial, consider using a straightedge or T-square as a guide while marking.
Step-by-Step Guide on How to Cut Rubber Gym Mats
Achieving a flawless cut on your rubber gym mats involves precision, patience, and a bit of know-how. Here’s your comprehensive guide to ensuring a clean and accurate cut, tailored to your gym space’s exact needs.
Starting the Cut
Before diving straight into the cutting process, it’s vital to set things up correctly.
- Positioning the Straightedge or T-Square: We recommend laying the gym flooring mats in a brick pattern. Align your straightedge or T-square with the marked line you’ve drawn on your mat. This ensures your initial incision and subsequent cut remain straight and true to the measurements.
- Making the Initial Incision: Hold your utility knife along the cut line at a slight angle and make a small, gentle dip at the beginning of your marked line. This serves as the starting point and allows for greater control as you proceed.
Proceeding with the Cut
Once you’ve made the initial incision, it’s time to glide through the mat.
- Apply Steady, Even Pressure: Push the utility knife with consistent force and apply firm downward pressure. The force can be different for thick rubber sheets and thinner mats. Too much pressure can cause the blade to veer off course, while too little might not penetrate the mat fully.
- Follow the Marked Line: Keep the blade aligned with your drawn guideline. The straightedge or T-square serves as your guide, ensuring you don’t stray from the intended path.
- Techniques for a Clean Cut:
- Always keep the blade perpendicular to the mat’s surface to ensure depth uniformity.
- If resistance is felt, it might be time to replace or sharpen the blade.
- Pull the mat taut (but not stretched) from the opposite end to create a smooth surface for cutting.
Handling Curves or Angles
Cutting straight lines might be straightforward, but curves or angles require a bit more finesse.
- Managing Complex Cuts: When tackling curves, make smaller and more controlled cuts rather than attempting one continuous slice. Think of it as connecting small straight lines to form a curve.
- Maintaining Blade Sharpness: Curves and angles can dull your blade faster. A sharp blade is essential for precision, so regularly check its sharpness and replace it when necessary.
Safety Precautions
When cutting rubber floor gym mats, safety should always be a priority.
- Proper Handling of the Utility Knife: Always hold the knife with a firm grip, and ensure your hands are dry to prevent slipping.
- Mindful Hand Placement: Ensure your non-cutting hand (the one holding the mat or straightedge) is always away from the direction of the cut. This reduces the risk of accidental injuries.
- Take Breaks: If you’re cutting multiple mats or find the process tedious, don’t hesitate to take short breaks. Fatigue can lead to mistakes or accidents. A fresh mindset and a steady hand are essential for precision.
Post-Cutting Steps
After successfully cutting your mat, the work isn’t entirely over. The post-cutting steps are crucial in ensuring your effort culminates in a neat, professional look, and that any remnants are managed responsibly.
Checking the Fit
- Place in the Intended Location: After cutting, immediately position the mat in its designated spot. This allows you to verify that your measurements were accurate and that the cut aligns with the space’s contours.
- Ensure Proper Alignment: The mat should sit flat against the floor without any bulges, bubbles, or overlaps. Ensure the edges align perfectly with any adjoining mats or boundaries. If there are slight discrepancies, you might need to trim a tad more for perfection. It’s easier to trim a little extra to avoid the mats looking unfit.
Cleaning and Storing Unused Pieces
Larger pieces that remain after cutting can be valuable. Store these in a dry, cool place. They can be useful for patching any future damages, serving as underlays, or even for smaller areas in need of a rubber surface. When storing, roll them up and secure them with a band or string to save space and ensure they retain their shape.
For smaller offcuts that can’t be reused, it’s essential to dispose of them responsibly. Rubber doesn’t degrade quickly in landfills. Consider:
- Recycling: Many municipalities have recycling programs that accept rubber. Check with local regulations and drop-off points.
- Repurposing: Think creatively. Smaller pieces can be used as grip bases for movable furniture, cushioning for fragile items, or even as makeshift door stoppers.
- Proper Disposal: If recycling isn’t an option, and repurposing doesn’t fit the bill, ensure you dispose of the remnants in accordance with local waste management guidelines.
Bottom Line
Crafting the perfect gym space requires attention to detail, dedication, and the right equipment. The Dynamo Fitness Equipment Blog is your go-to resource, brimming with insights, tips, and solutions for all your gym needs.
But what’s a gym without state-of-the-art equipment? Dynamo Fitness Australia is dedicated to empowering your fitness journey with the finest gym equipment on the market. Whether you’re setting up a home gym or revamping a commercial space, our range of equipment promises quality, durability, and performance.
Browse our selection online to find the perfect fit for your needs. If you prefer a hands-on approach, we invite you to visit our stores in Sydney, Melbourne, and Perth Australia. Our experts are on hand to guide, assist, and ensure you make the best choices.
Let Dynamo Fitness be a part of your journey, ensuring every workout is backed by excellence. Contact us now and transform your fitness space today!
Read also:
How to Clean Rubber Gym Mats: A Step-by-Step Guide
5 Reasons why you need Jigsaw Flooring Mats for Martial Arts
Tips for Choosing and Organizing Your Home Gym Equipment